
How to find the Nightsong in Baldur’s Gate 3
Baldur’s Gate 3 is a huge open-world RPG with tons of side quests, but one in particular is very important to the overall story of the game’s second act, and Shadowheart’s questline: finding the Nightsong. Though you’ll first get the lead for this quest during Act 1, you won’t be able to finish it out until the end of Act 2. This can be a bit confusing, especially since the quest itself is fairly long, so we’ve charted out exactly how to find the Nightsong in Baldur’s Gate 3. Note: There will be spoilers in this guide so proceed with caution.
How to find the Nightsong in Baldur’s Gate 3
You will first encounter the quest to search for the Nightsong during the first act of this game while you explore the area around the Nautiloid crash. As you flesh out this first area’s map, you will eventually find out that the grove’s first Druid, Halsin, went with a group of adventurers who were looking for an artifact called “the Nightsong.” Their leads brought them to a temple below the goblin camp, but they were captured/killed before they could make any progress.
However you end up proceeding with Halsin and the druid camp, your knowledge of the Nightsong will add searching for it to your questlog. Now this is where the quest may get a bit frustrating. Though you can descend below the goblin camp and even find an entrance to the Temple of Shar while exploring the Underdark in between the first and second acts, you can’t actually complete the quest until you’re ready to finish up Act 2. So take care of everything else you want to first, then focus on finding the Nightsong.
Once you’ve progressed to the Shadow-Cursed Lands in Act 2, you will need to head to the Grand Mausoleum. Here, Raphael will be waiting for you and will give you a side quest to kill the old enemy of his that lurks within the ruins. This is actually a key part of finding the Nightsong, so bookmark that for now. To get to where we’re actually going, you need to solve a puzzle in the mausoleum. You need to push the buttons underneath three paintings in the correct order: Moonrise Towers, Grief, General.


Once you do this, the wall of the mausoleum will open, allowing you to enter the temple that houses the Gauntlet of Shar. Here, you will need to gather four umbral orbs to open the door’s to the temple’s inner sanctum. Each orb corresponds to a Dark Justiciar trial that Shadowheart wants to complete, except for one, which is in the lair of Raphael’s old enemy.
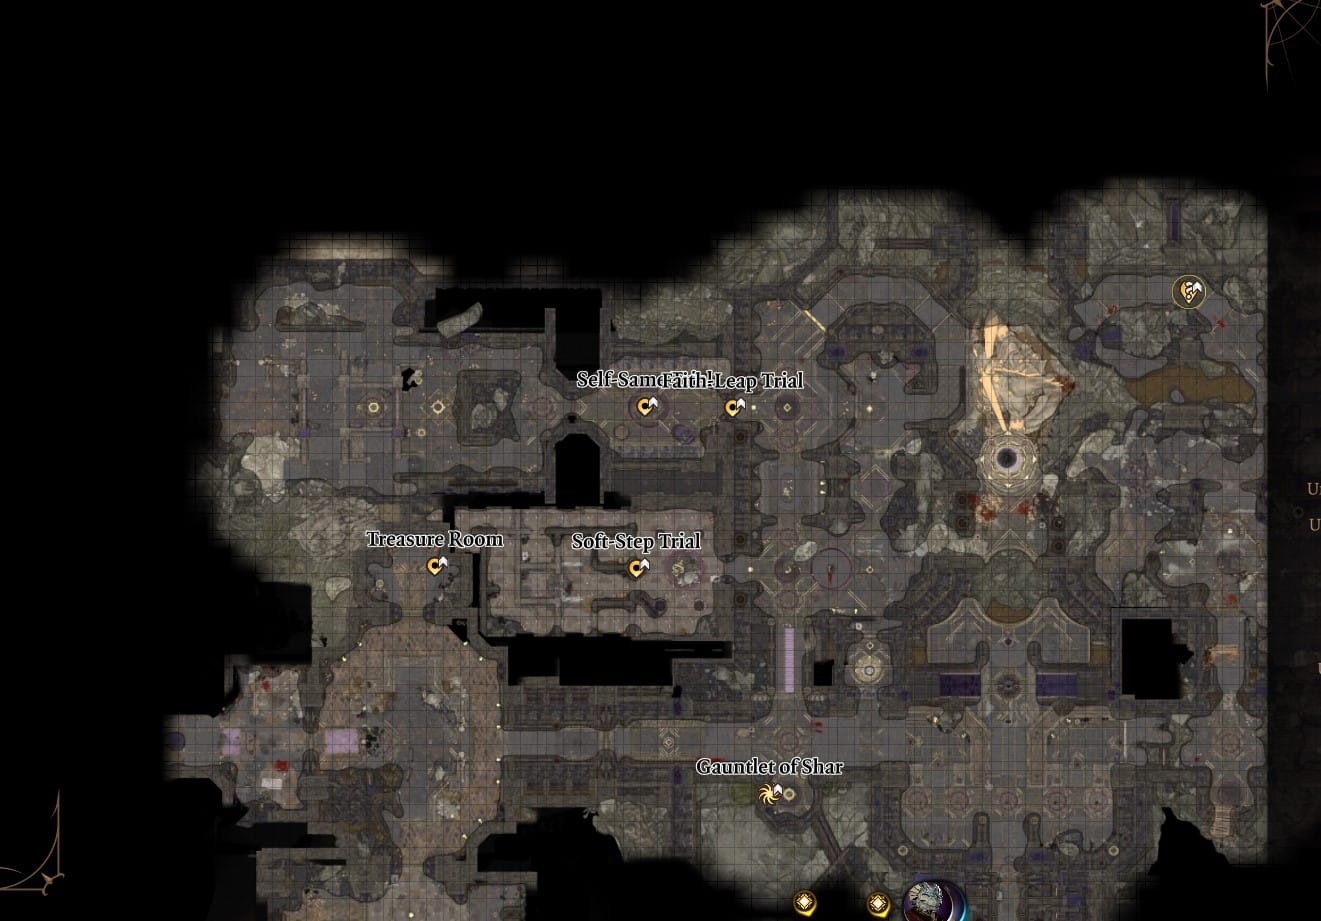
Soft Step Trial
The Soft-Step Trial tasks you with sneaking safely through a maze that is guarded by sentient shadows. Ideally you want to ungroup and just have one character take this on (we recommend Astarion, or your own character if they’re a rogue). If you have enough lockpicking and trap disarm kits, you can go around the maze and disarm/unlock everything before you actually start the trial by offering a blood sacrifice.


Once you reach the end of the maze unseen, grab your umbral gem and get the heck out of there.
Faith Step Trial
This trial asks you to cross a room shrouded in magical darkness by using an invisible walkway. The thing is, the walkway isn’t invisible all the time. If you’re far enough back from it, you can see the path — though it’s pretty dark so you may want to turn your brightness up — and can either memorize or take a screenshot of it. To get all the way across the room and collect your umbral gem, you need to make sure you at least touch the pathway sometimes. If you try to cross the gap without touching it at all, the room will send you back to the start.
Self-Same Trial
In this trial, you and your party will face clones of yourselves in combat. To make matters even more complicated, every party member will receive a debuff if they hit a clone that isn’t their own. An easy way to cheese this fight is to enter the room with everyone in your party naked and having no weapons equipped. After you’ve done the blood sacrifice, you can put all of your gear back on before you start the battle with the dopplegangers, so take that opportunity to suit back up and destroy your un-equipped clones. Once you’ve defeated them, you can snag the gem at the top of the stairs.

Raphael’s old enemy
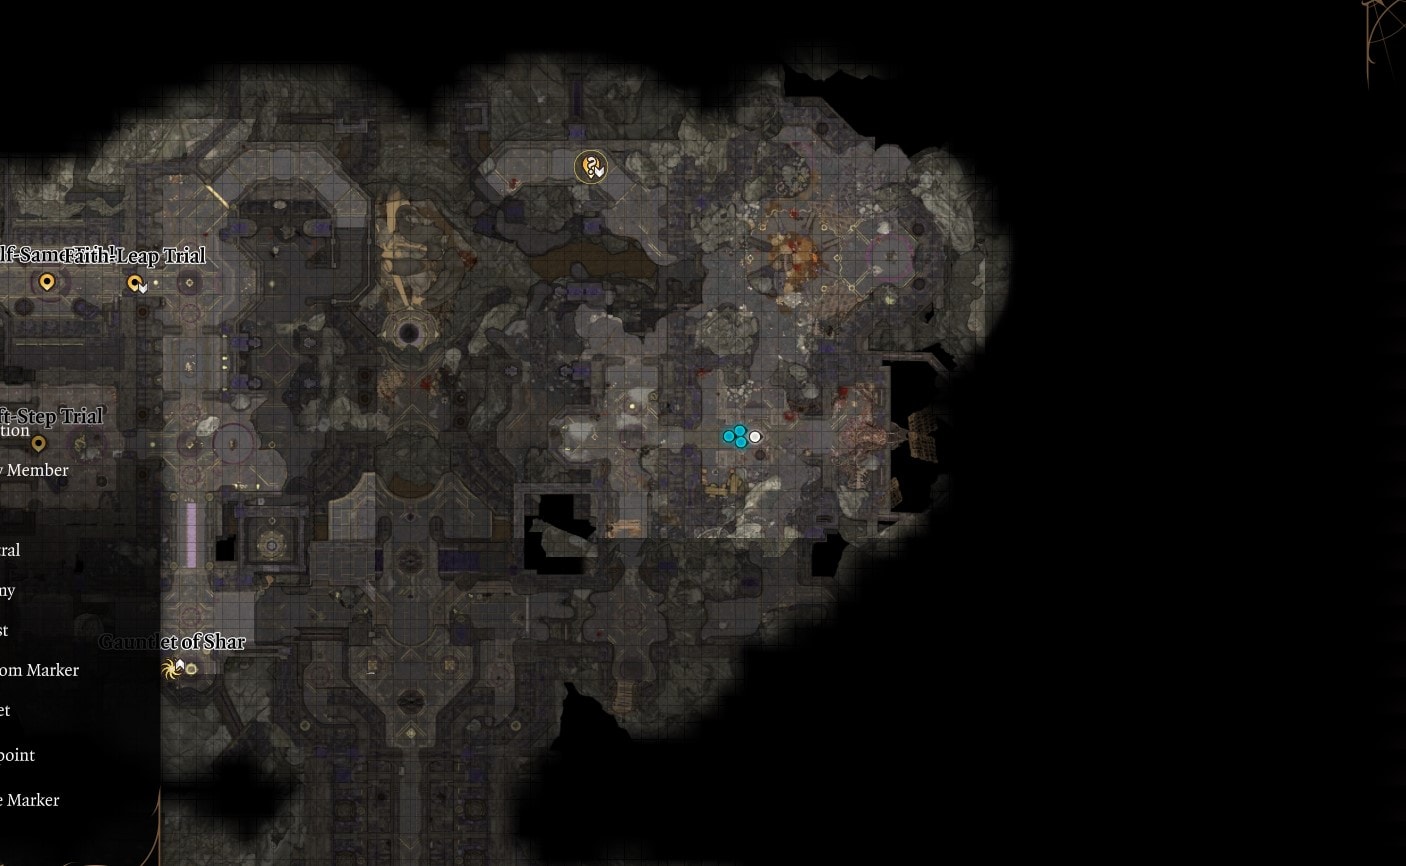
Raphael’s old enemy is an Orthon demon named Yurgir who made a literal deal with the other devil that keeps him trapped within the temple ruins. It turns out he’s been tasked with killing all of Shar’s devotees and Justiciars, which explains the carnage you’ve seen all over. He and his Meregron forces are found to the right of the Faith Leap and Self-Same Trial rooms. You should see a black panther-like displacer beast sitting in that direction that you can follow to the chamber.
Depending on your class, you’ll have different options to deal with the demon. You may be able to convince him to kill his forces, pet, and himself in order to fulfill the terms of the contract. If that fails, you can either try to persuade him to let you investigate the ruins for any clues he’s missed or to just kill him like Raphael wants.
If you choose to fight him, note that this is a difficult battle, especially if he still has all of his minions. We recommend trying to pick off as many of the Meregrons as you can using stealth before starting the actual fight. We also suggest targeting the displacer beast first, as it can copy itself and cause a lot of chaos for you and your party.
Once you’ve taken care of the Orthon and his minions, you can collect the umbral gem that’s resting on the platform at the back of the chamber near his gross bed.
Enter the Shadowfell
To advance multiple quests, you’ll need to open the inner sanctum and enter the Shadowfell. It’s important to note that once you enter the Shadowfell in the temple, you will not be able to fast travel back to Act 1 locations.
Place one umbral gem in the pedestal with the glowing ring around it that repels you if you get too close. You will need to either unequip your moon lantern, or trigger the void traps near the sarcophagi to plunge the room into darkness so you can enter the rings and place the gem.
With that done, you’ll need to place the remaining gems in the pedestal back near the stairs you jumped across to reach Yurgir. Use the platform elevator to descend to the inner sanctum doors and open them. A portal to the Shadowfell will be there. Enter it and watch the cutscene to see that Balthazar the necromancer has followed you.
As you progress through this section of the Shadowfall you will discover that the Nightsong is actually a person — the Aasimar daughter of the moon goddess Selune. Balthazar and Ketheric Thorm trapped her in this place so Thorm could siphon her immortality off for himself. When you confront Balthazar, you’ll be faced with a couple of big decisions.
The first is whether you’ll let Balthazar take Aylin (the Nightsong) back to Ketheric Thorm. If you refuse to let him, you’ll have to fight him and a bunch of undead goons. We highly recommend having Shadowheart use Turn Undead and the radiant version of Spirit Guardians to quickly control the crowd.
If you keep Aylin from Balthazar, you’ll be faced with the next choice: will you let Shadowheart kill the Aasimar to become one of Shar’s Dark Justiciars or not? You can stand back and let her do it, try to convince her not to, or allow her to make the choice for herself. If you haven’t cleared Moonrise Towers out already, we recommend having Aylin live, as she’s a powerful ally in the upcoming battle (and is a queer character to boot!)
With Aylin alive, you can wrap up the Nightsong quest by talking to the wizard who originally sent adventurers to retrieve it in Baldur’s Gate.